The Scheduled Routes tab in the Admin view gives you full control over services that have already been scheduled. From here, you can view, edit, filter, reschedule, and even pre-print your invoices all in one place.
Accessing Scheduled Routes
In the main navigation panel on the left, click Scheduling.
Select Scheduled Routes from the dropdown menu.
View & Edit Routes
At the top of the page, click View/Edit Routes to:
Manually rearrange the order of stops
Save changes to the route sequence
Click here for more info
Search & Filter Tools
Across the middle of the screen, you’ll find powerful tools to quickly locate services:
Search Bar: Enter a customer’s name to instantly locate their scheduled service.
Filters (Click the blue “Filters” button):
Technician name or Job Assign ID
Route name
Property type or address
Notification details
Select Job Assign Date: Choose the date to only look at the routes scheduled for one specific day.
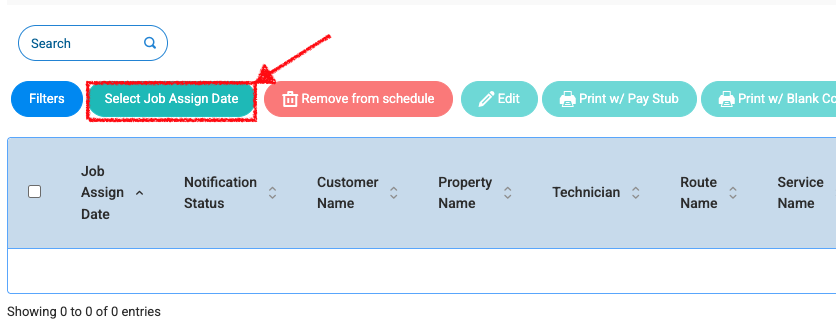
These tools are perfect for narrowing down large schedules quickly and accurately.
Editing Scheduled Services
Select one or more services from the table below.
Click Edit to:
Reschedule to a different day or time
Reassign to another technician
Send important rescheduling notifications to the customer
Printing Options
From this screen, you can also:
Pre-print invoices, including options with:
Pay stub
Blank compliance data
Print technician routes—even if you forgot during initial assignment.
Remove from Schedule
Need to make a change?
Select any individual or group of services
Click the red Remove from Schedule button
Note: Removed services will return to the Unscheduled Services screen, so you can reschedule them later.
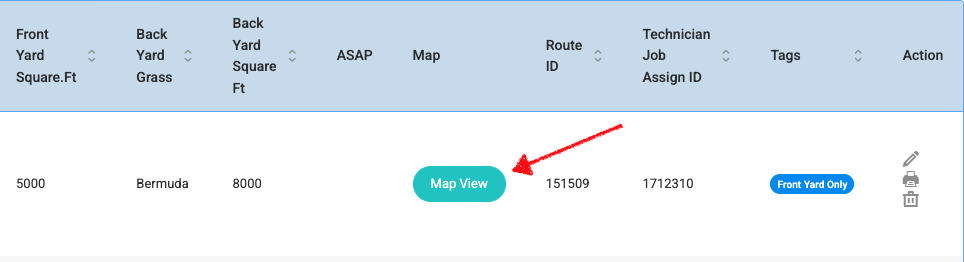
View Property Details
After selecting a service from the list, check the middle of the screen to view detailed property information before making any adjustments. This includes:
- Square footage details
- # of properties selected
- Revenue amount for selected properties
Map View
If you'd like to see the route on a map, from the Admin side, navigate to your Scheduled Services page. Scroll all the way to the right of the page and click on "map view". This will show you the route order on a map.
Pro Tip:
Use this screen as your hub for quick service adjustments, customer communication, and compliance prep. It’s designed to keep your schedule flexible and organized.