Using the Map View
On the Unscheduled Services screen, there is a toggle at the top right for "Map View" that will allow you to view your properties on a map while scheduling, instead of just the table view.
Note You may also set the map view as your default view if you would like by going to Global Settings page under DEFAULT ASSIGN SERVICES VIEW.

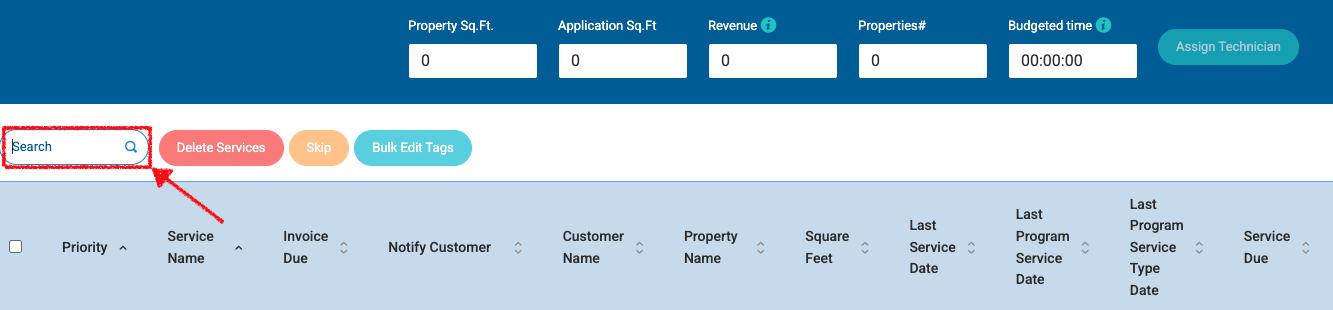
The "map view" screen is a screen that displays both the map and the properties list at the same time (map on top and properties list on the bottom). As you filter the list of available work ("unscheduled services"), the map will update to display only those properties as you click the "Update Map" button at the bottom of the filters section. Also, you can zoom in or out on the map to zero in on specific areas, and the table list on the right will then display only the properties that are visible on the map. Follow the detailed instructions below to use this feature.
How to Schedule Services
Step 1: Navigate to the map view screen: https://dashboard.spraye.io/admin/assignJobsMap
Step 2: Enter your filter criteria in the filter section on the right side of the map to show your desired services
You can filter the list by Property Type, call-ahead/notification status, services, service area, tags, and more.
Step 3: Once you have finished entering your filters, then click the "Update Map View" button at the bottom of the filter section.

Additionally the Search box at the top table can be used to further filter the data. You could filter for all the services in a particular City or Zip Code using this option.
Note
The property list will filter properties as you zoom in/out/move the map and use the filters
Only properties visible on the map will show in the property list.
You are able to search/filter/sort by all other currently available fields (Plus zip code)
Map will only show properties that are still visible in the filtered table
You are able to select all visible or choose multiple properties (with checkboxes) just like on the Unsch Services table view.
When selected, the corresponding pins on the map change to show a black outline
If you hover over a pin on the map, it will show the property name & address
How to Choose Properties using Polygon(s) and Clicking on Markers
Step 1: Follow instruction above to enter filter criteria and zoom into the section of the map you would like to schedule.
Step 2: Click on the "Polygon" icon at the top of the map.
Step 3: Draw your polygon around your desired properties by clicking to drop points onto the map. Complete your polygon by clicking back on your original point.
Step 4: Click on any other services you would like to include or add additional polygons to choose more properties.
Step 5: Assign services to your desired technician by clicking the "Assign Technician" button at the bottom of the map section.
Note: If you draw a polygon on the map, but want to delete it or start over, you can use the "Delete" button on your keyboard to delete it while it's selected. You can also edit the polygon but selecting it and dragging the end points to the desired position.
Understanding the Map Markers

Past Due (for services): These services are past the ideal scheduling window for completion

New Customer: These are new sales that have not received a service

Pre-Notified/Call Aheads: These customers will receive a pre-service notification reminder and/or require a phone call ahead of service.

ASAP: Indicates a service that has been marked as "ASAP" to be completed first.
Service Types: Each service offered by your company can be categorized into "Service Types" for easier reporting and scheduling. These can be defined in your Global Settings and you can choose a unique color for each Service Type that will then determine the color of the markers for each service on the scheduling map.
# of Days Since Last Service: The number that appears in the center of the map markers represents the number of days since that customer last had a service of that same service type. If there has never been a service of that type, then it will display the number of days since that specific program was assigned.

Multiple Service Marker: A property with multiple filtered services (i.e. Grub Control & Round 3) will show a small circle below the main marker. This circle will indicate the # of additional services at this property by the # of rings you see inside the circle. Additionally, the color of the circle or rings indicates the service type of this additional service.