
While field technicians typically complete stops on their mobile devices, administrators occasionally need to log service completions directly from the desktop interface.
The Complete Services action button on the customer Services tab allows office staff to manually mark one or more scheduled or pending services as completed. This function updates property records, logs chemical application data, generates corresponding invoices, and advances recurring service program schedules.
Key Functions & Features
When you use Complete Services, the system executes the following operational steps:
- Record Migration: Moves selected items from the active Services schedule to the Completed Services tab.
- Chemical Tracking & Reporting: Prompts for regulatory and compliance details (e.g., application rate, target pests/weeds, products used, and weather metrics).
- Invoice Generation: Triggers billing based on your account's invoicing preferences, queueing or generating an invoice under the Invoices tab.
- Program Scheduling: Advances recurring multi-round treatment programs to calculate and queue the next scheduled application.
Step-by-Step Instructions
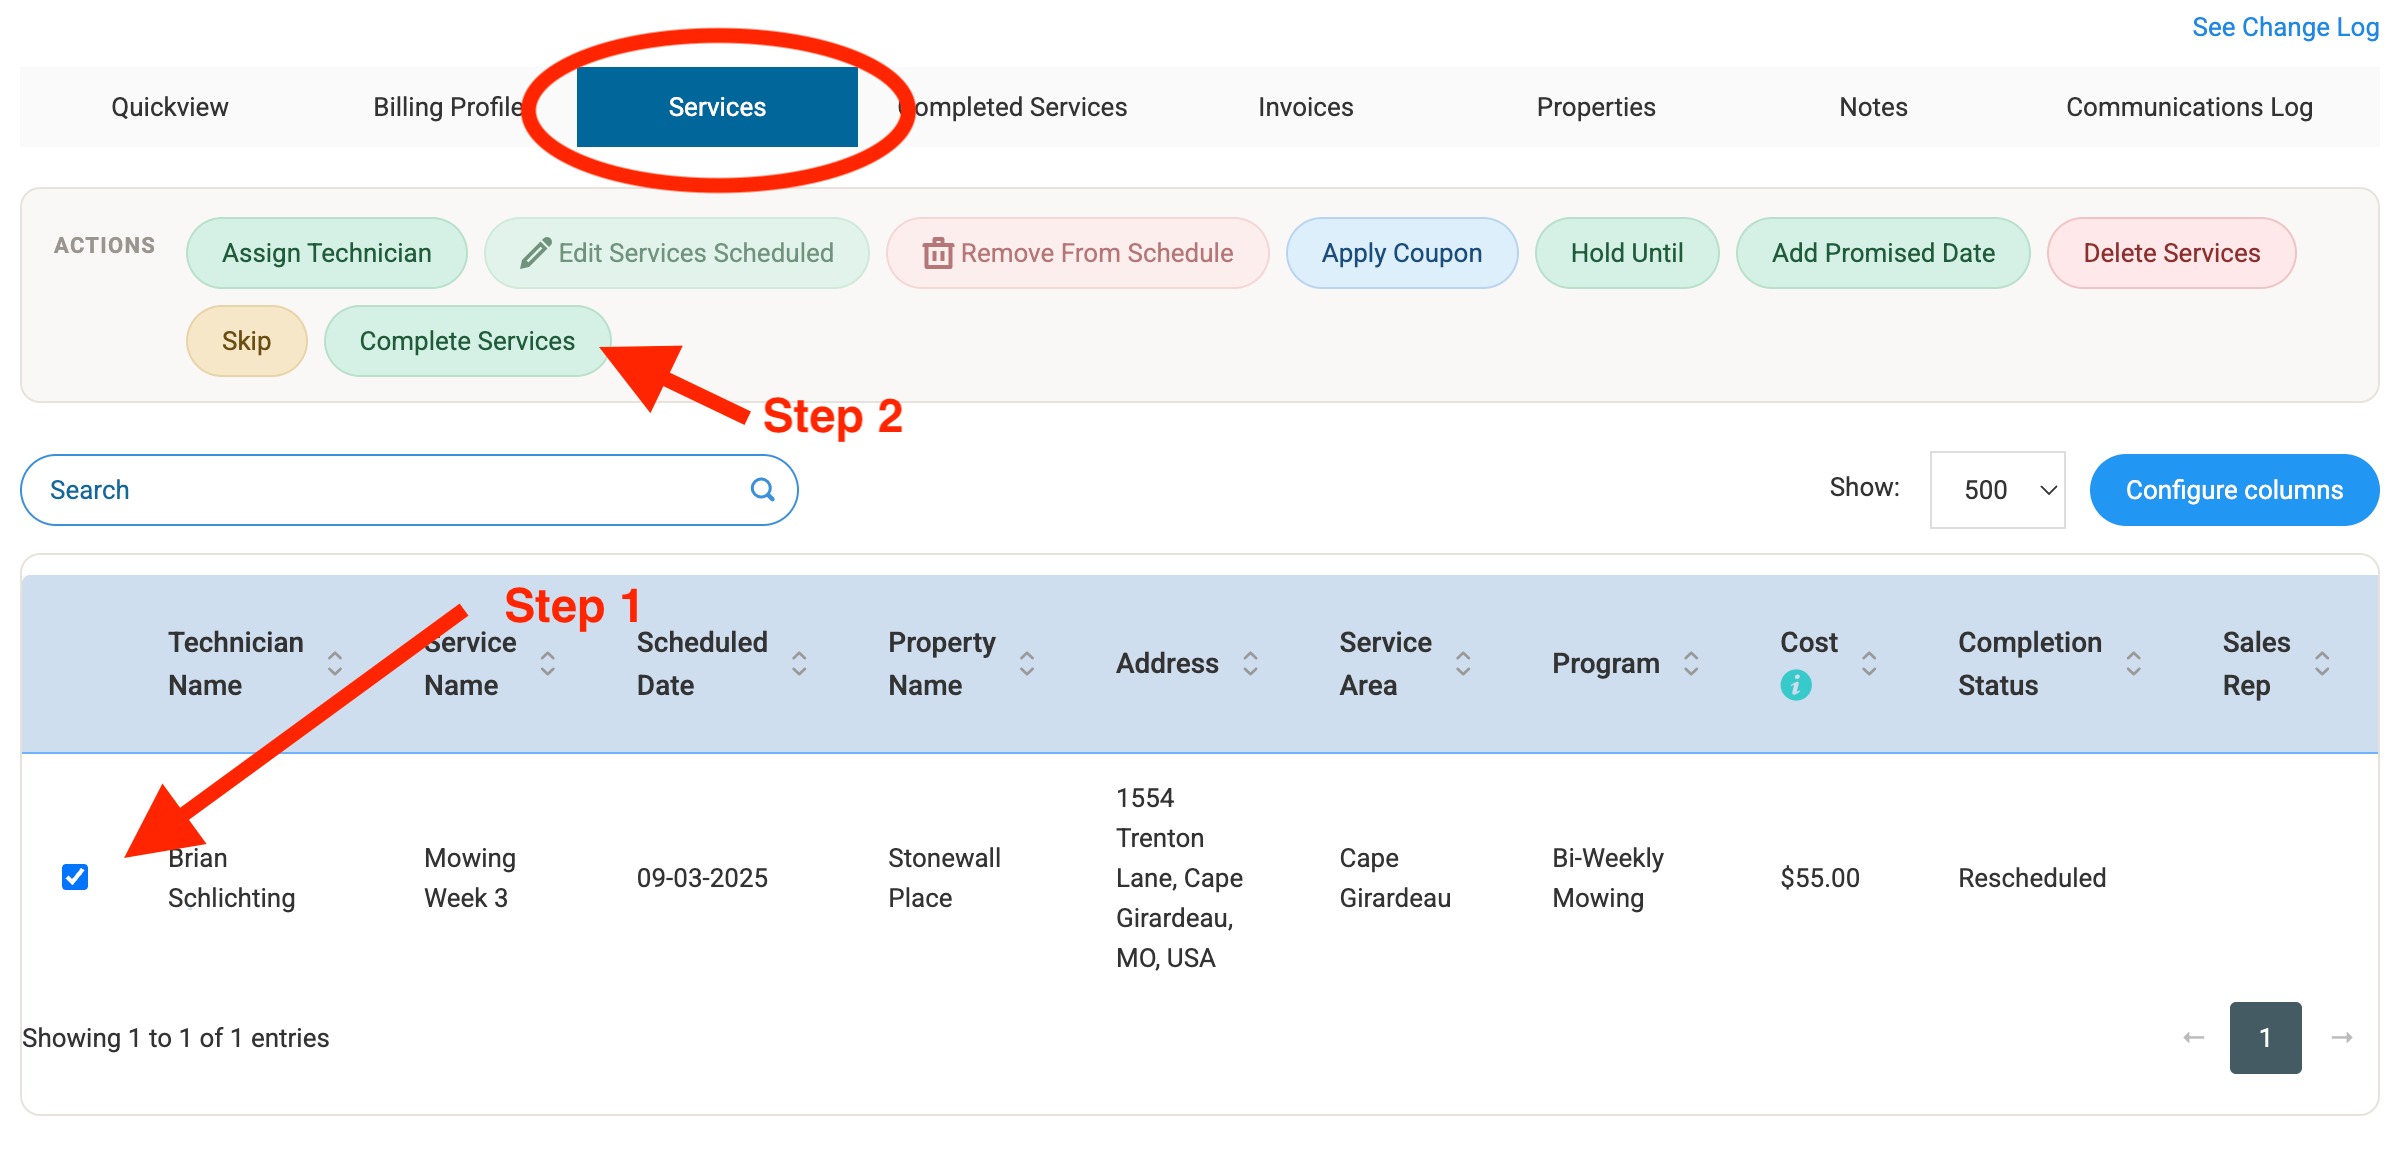
Step 1: Locate the Customer's Services Tab
- Search for and select the target customer profile.
- Click on the Services tab located on the primary navigation menu.
Step 2: Select the Service(s)
- Locate the scheduled service(s) in the table below the action toolbar.
- Select the checkbox adjacent to each service item you wish to mark complete.
Step 3: Trigger Service Completion
- Click the light-green Complete Services button located in the ACTIONS toolbar.
- A pop-up modal will appear requesting completion parameters.
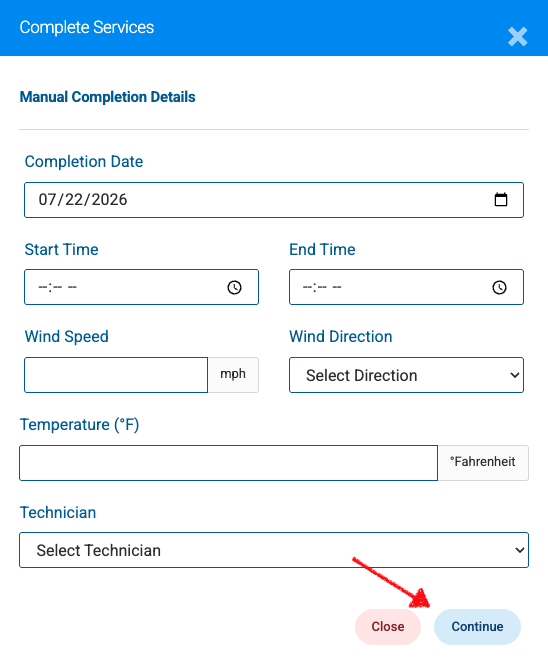
Step 4: Fill Out Completion Details
In the Complete Services modal, enter the relevant job details:
- Completion Date: Select or enter the date the service was performed using the date picker.
- Start Time & End Time: Input the precise times the technician arrived and completed the application.
- Wind Speed & Wind Direction: Enter the wind speed (in mph) and select the wind direction from the dropdown to ensure spray/drift compliance.
- Temperature (°F): Enter the ambient air temperature in degrees Fahrenheit at the time of application.
- Technician: Select the assigned technician who completed the service from the dropdown list.
Step 5: Save & Finalize
After clicking Continue in the initial details window, complete the follow-up screen options:
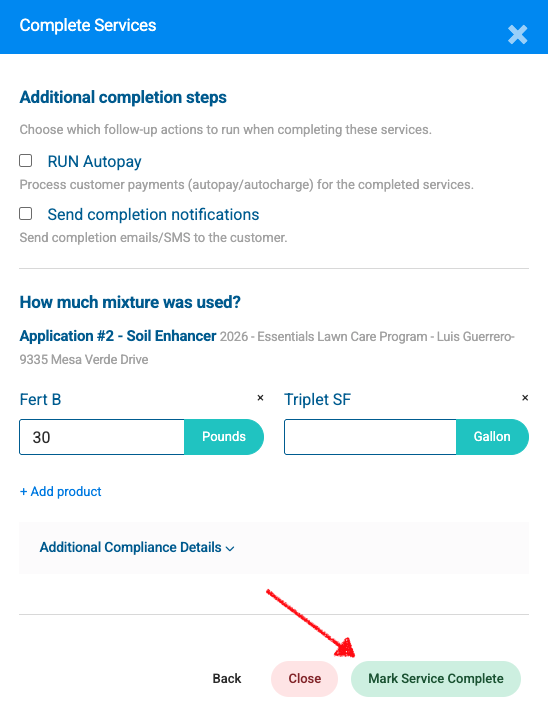
- Select Additional Completion Steps:
• RUN Autopay: Check this box to immediately process automatic customer payments (autopay/autocharge) for the completed service(s).
• Send completion notifications: Check this box to trigger automated completion emails or SMS messages to the customer. - Log Mixture & Product Usage:
• Under How much mixture was used?, specify the chemical/product applied for the service.
• Click + Add product to record additional chemicals or mix quantities as needed. - Expand Additional Compliance Details (Optional):
• Click the Additional Compliance Details dropdown to input any required state or regulatory information not captured on the previous screen. - Finalize Completion:
• Click the green Mark Service Complete button in the bottom-right corner.
• The record will now migrate to the Completed Services tab, and any selected billing or notification actions will immediately execute.
Best Practices & Common Use Cases
- Paper Work Orders: Use this workflow when processing physical paper route sheets submitted by applicators at the end of the day.
- Connectivity / Technical Overrides: Utilize desktop completion if a technician experienced network drops, battery loss, or device failure in the field.
- Compliance Accuracy: Ensure accurate product quantities and chemical application rates are entered into the modal to maintain compliance with local and state regulatory reporting standards.