To see all notes and tasks in the system, select the "Notes" tab from the left-hand menu on the main dashboard screen.
From this screen you can sort and filter the notes based on many different filters and categories. For example: View all Customer Notes, all Property Notes, or only Technician Notes. You can also filter by who created the note/task or filter by who the note/tasks are assigned to. You can also choose to view only tasks which have an "open" status and are not yet completed.

Creating a New Note
Step 1: Locate and Select the Customer
- Go to your Spraye dashboard.
- Navigate to your customer list by clicking Customers in the main menu (or go directly to
dashboard.spraye.io/admin/customerList). - Search for the customer using the search bar, and click on their name to open their profile.
Step 2: Open the Notes Tab
- Once you are inside the customer's profile, look at the menu tabs on the far right.
- Click on the Notes tab.
Step 3: Create and Configure the Note
- Click the blue Add New Note button.
- Associate with a Property (Optional): You can select a specific property from the dropdown if the note only applies to one location, or skip this step to leave it as a general account note.
- Select Note Type: Choose the category for your note (e.g., Task, Customer Call, Sales Visit).
- Assign a User/Task (Optional): If this note requires action from someone else, you can select the "Task" note type. This allows you to assign a specific team member, set a due date, and track it as an open ticket. They will receive a notification automatically.
- Add Attachments: You can upload relevant images or PDF documents directly to the note.
Step 4: Set Visibility and Save
- Technician View: Check the "Include in technician view" box if you want your field technicians to see this note on their mobile app when servicing the property.
- Customer View: Toggle the "Include in Customer View" option if you want this note to be visible to the client inside their customer portal.
- Enter Comments: Type your detailed notes or log information into the text box.
- Click Save.
Bulk Complete Selected Notes
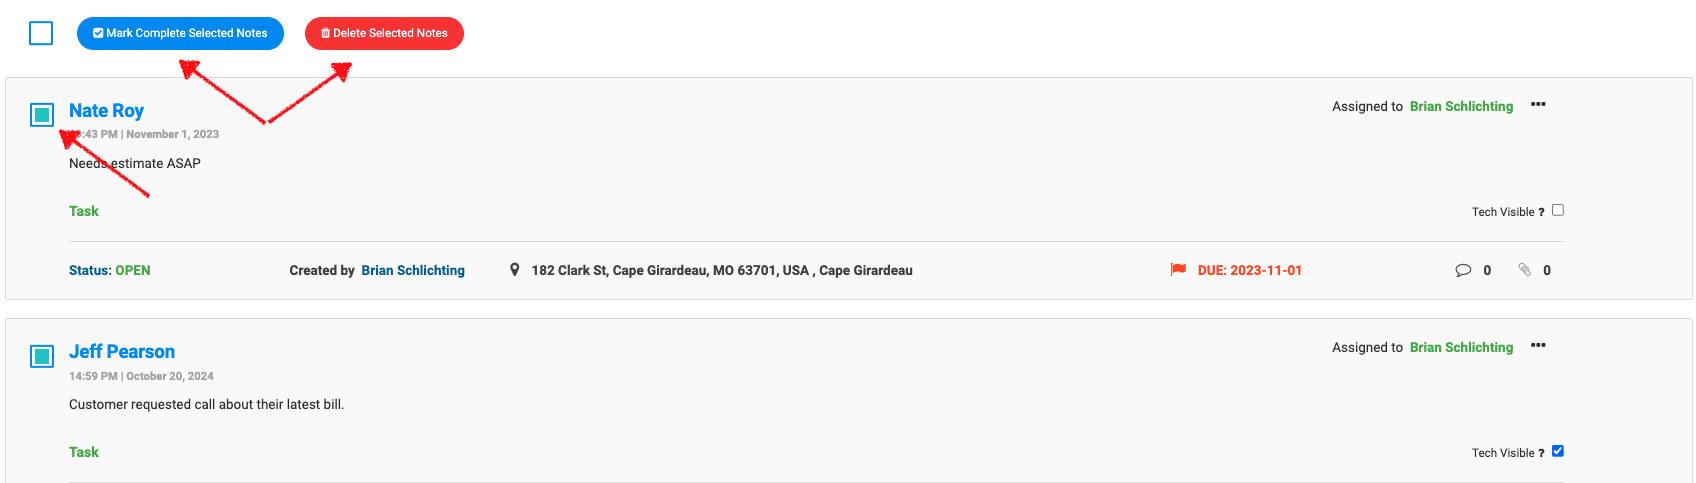
Notes can be completed in bulk by clicking the box to the left of the note to select it. Once you select all of the notes to be completed then click on the "Mark Complete Selected Notes" button at the top.
Bulk Delete Selected Notes
Notes can be deleted in bulk by clicking the box to the left of the note to select it. Once you select all of the notes to be deleted then click on the "Deleted Selected Notes" button at the top.